Once a signature is created, it can be used quickly for future signing efforts, or shared with other users, please see below for steps on each process.
You will first need to create the certificate and the image you would like to use (and if sharing, ensure the image is in a shared network location).
1. Open a new document and use the Sign Document tool under the Protect Tab.
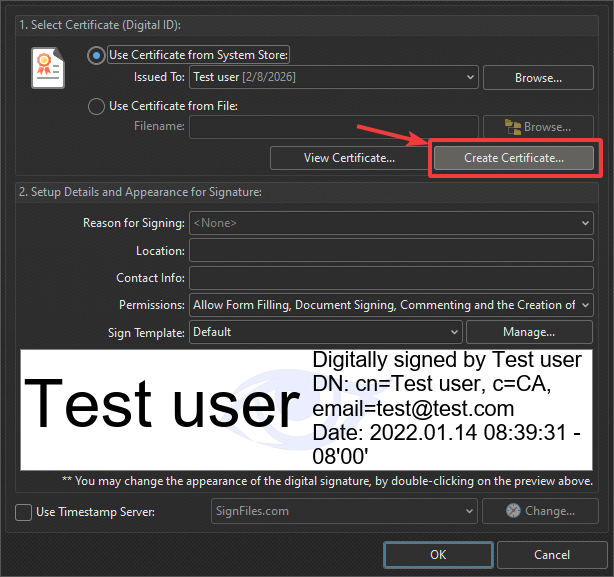
2. Click Create Certificate:
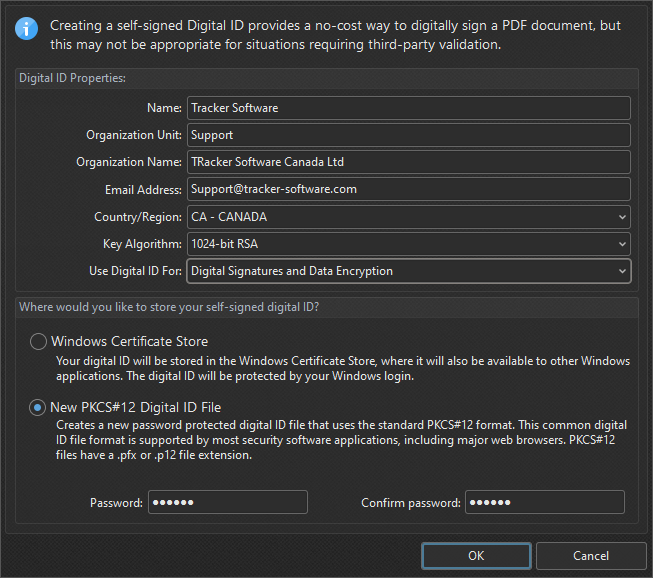
3. Fill in the fields as desired, (If you will be sharing the certificate be sure to select “New PKCS#12 Digital ID File”).
If this is to be a personal certificate for use on one device, use the Windows Certificate Store option instead.
4. Once you have set a password, click okay, you will then be prompted to save the file to a location.
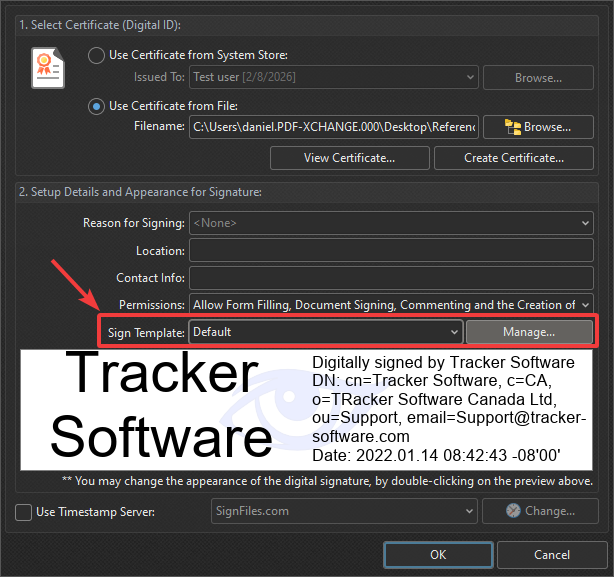
5. Select Manage:
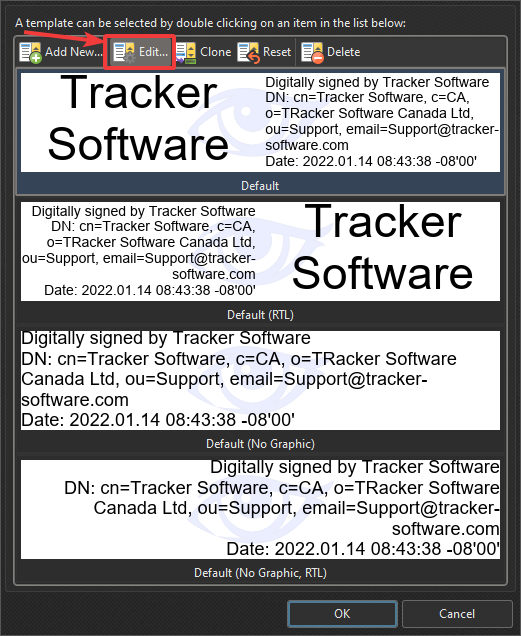
6. Select the template you would like to share, and click Edit:
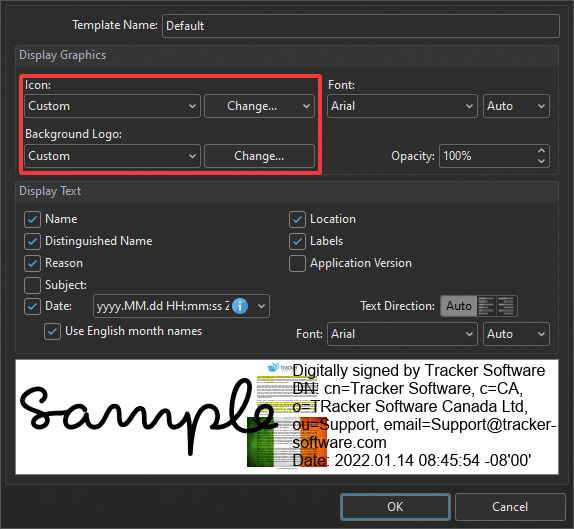
7. Choose Custom Icon, or background logo (If sharing these should also be available on the shared network location):
8. Deselect all aspects of the certificate you do not want displayed:
At this point, you should have a certificate with an image ready to use for signing, possibly in a shared location.
(Note that this ONLY shares the appearance customizations from the signature panel. The Certificates themselves are not shared in this way. You must store your certificate files in a location accessible to others who will be making use of them, manually.)
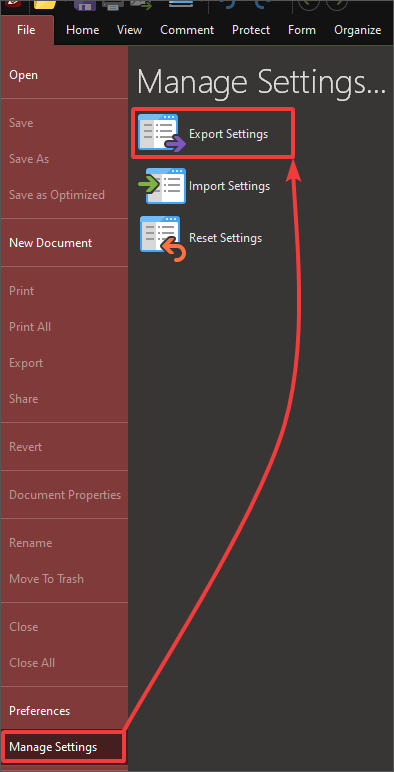
1. Open the File tab and choose Manage Settings > Export Settings:
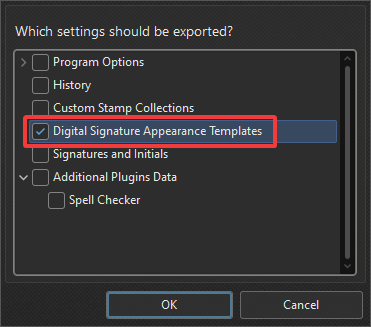
2. Select Digital Signature Appearance Templates and Deselect all other options:
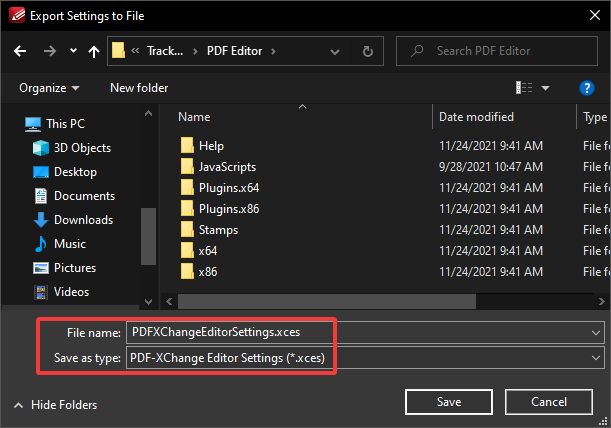
3. Save the settings Export to an easily accessible location with a user friendly name:
4. Distribute this file to your users, and have them Import this file into their PDF-XChange Editor or Editor Plus application in order to finalize the sharing process.
If you have any further questions or concerns, please send an email to support@pdf-xchange.com
You can contact us by phone, email or our social media accounts — we are here to assist you.