I want to add custom stamps to the Stamp Palette for use with the Stamp Tool.
Before PDF-XChange Editor or PDF-XChange Viewer are used to create stamps it is important to note the following:
Please see below for further information on how to create stamps in PDF-XChange Editor/Viewer:
For more detail follow the instructions here in order to create and utilize stamps.
Add New Stamp from File
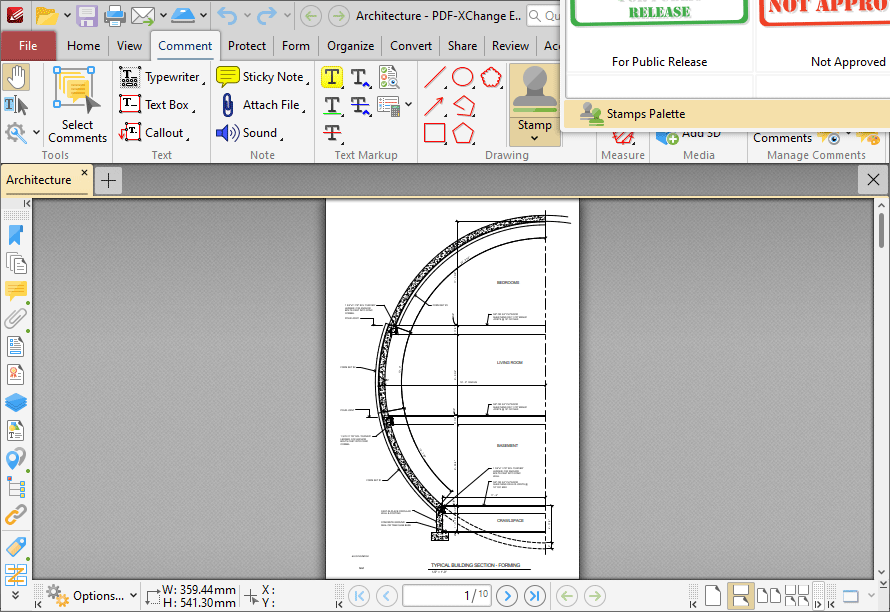
1. On the Comment tab of the ribbon UI (or the main toolbar in the classic UI), click the Stamp menu and then click Stamps Palette:
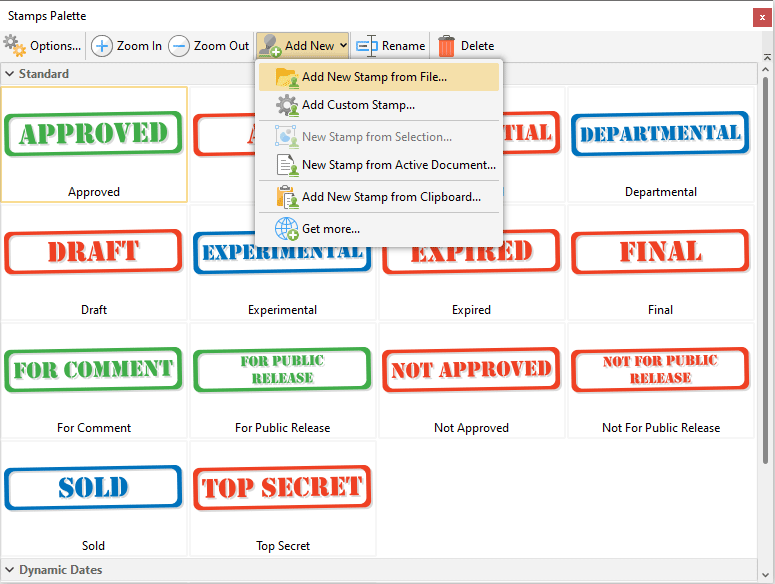
2. Click Add New Stamp from File:
3. Select the desired file and click Open, then click OK in the Add New Stamp dialog box. The stamp is then available for use in the window of the stamps palette, and in the stamps pane.
Add Custom Stamp
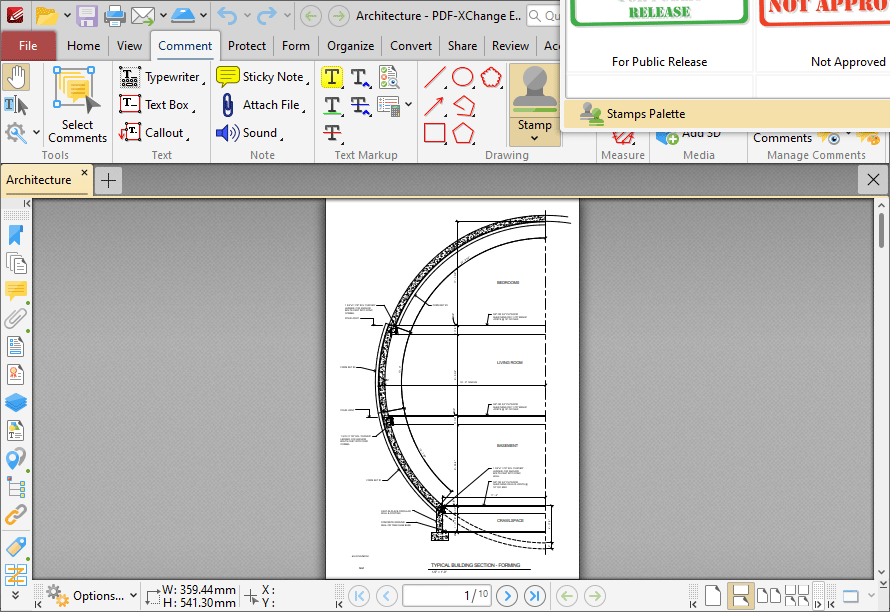
1. On the Comment tab of the ribbon UI (or the main toolbar in the classic UI), click the Stamp menu and then click Stamps Palette:
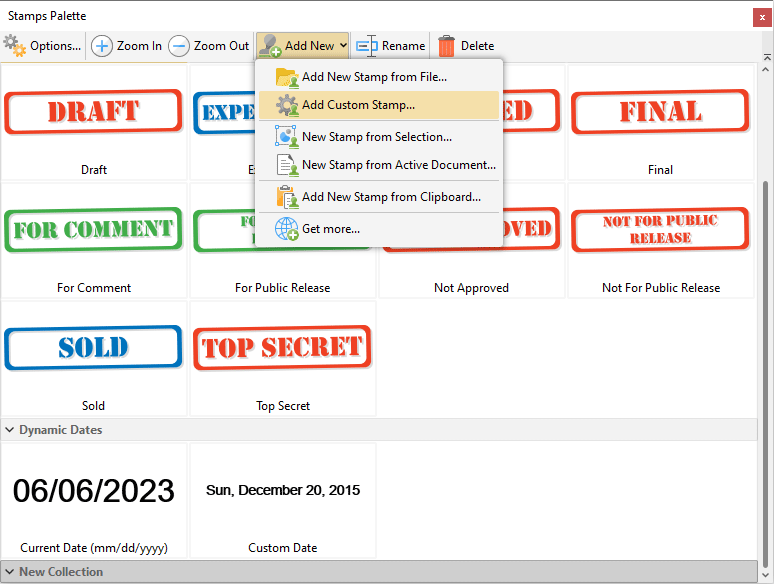
2. Click Add Custom Stamp:
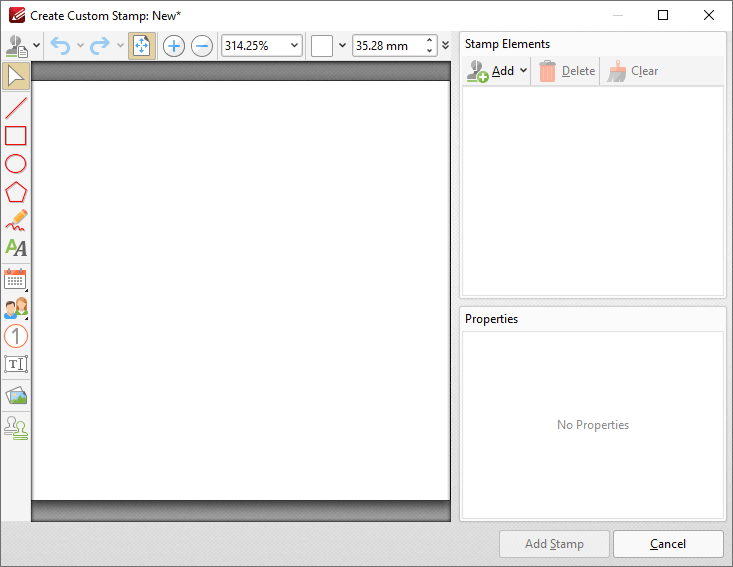
The Create Custom Stamp: New dialog box will open:
• Use the icons at the top of the dialog box to perform editing operations on custom stamps:
• Click Menu for menu options:
• Click New to create a new custom stamp.
• Click Open Template to select a custom template to add to the stamp editing area.
• Click Recent Templates to view/select from a list of recently used custom templates.
• Click Save to save the current custom stamp.
• Click Save As to save the current custom stamp with a new name.
• Click Crop White Margins to crop white margins from the stamp.
• Click Undo/Redo to undo/redo editing operations.
• Click Fit Page to set the zoom level so that the page fits the document window.
• Click Zoom In/Zoom Out to zoom in on/out from the document window, or enter the desired zoom level in the Zoom number box.
• Click the Background Color box to determine a background color for the stamp.
• Use the Width box to determine the width of the stamp.
• Use the icons on the left side of the dialog box as required:
• Click Select to select and interact with content in the document window.
• Click Line, Rectangle, Oval, Polygon or Curve to add these elements to stamps, then click and drag to add them in the stamp creation window.
• Click Text to add text to stamps.
• Click Date to add a dynamic date field to stamps. Date fields display the current date when stamps are added to documents.
• Click Identity to view identity options for adding content to stamps. Note that PDF-XChange Editor will use the identify information defined in the Identity preferences of the for this option:
• Click Name to add a field with your name.
• Click Login Name to add a field with your login name.
• Click Email to add a field with your email.
• Click Organization Name to add a field with you organization name.
• Click Counter to add a counter field to stamps, which is a field that contains a number that starts at one and will increase by one each time the stamp is placed. The Create Counter Field dialog box will open:
• Select Per Document if you want the counter to count per document, or Global if you want the counter to count continually through all documents.
• Enter a name for counter in the Counter Name text box.
• Use the Format dropdown menu to specify the format of the counter used in the field.
• Click Interactive Field to add an interactive field to stamps that users can interact with before the stamp is placed. The Create Interactive Field dialog box will open:
• Enter the desired label for the dialog box field in the Field Label text box. This text will be displayed in the dialog box that appears when the stamp is added to documents.
• Enter example field text in the Example text box. This text will be displayed as example text for the field in the stamp when it is added to documents.
• Use the Type dropdown menu to specify the creation of a Text or Date field as desired.
• Click From File to add an image from file to the stamp, then click and drag to determine the area in which the image will be placed. The Open Files dialog box will open and you can then select the file that you want to use in the stamp.
• Click From Template to add a predefined template to stamps. The Stamps Templates dialog box will open. Select the desired template and click OK to add it to the stamp.
• When you have added stamp content in the document window, you can use the Stamp Elements and Properties panes to edit stamp content and content properties as desired.
Click Add Stamp to add new stamps to the stamps palette.
Note that you can use the New Stamp from Selection, New Stamp from Active Document and Add New Stamp from Clipboard options to add documents from the current selection/document/clipboard content as desired.
Please note that the shortcut to the Stamp Tool is displayed in the Comment and Markup Toolbar:
1. Click the dropdown arrow on the right of the icon. A submenu will be displayed.
2. Click Show Stamps Palette. The Stamps Palette will open:
3. Click New to create new stamps. Please note that custom stamps cannot be saved in the same collection as Standard Stamps. Therefore a New Collection will be created automatically when the first new stamp is created.
4. The options From Image, From PDF and From Clipboard will become available at the top of the Stamps Palette. These options refer to the source of the new stamp:
From Image
When this option is selected, PDF-XChange Viewer will prompt for an image file to use for the new stamp. Select the desired file and click Open. The stamp will then be available in the new collection of the Stamps Palette.
From PDF
When this option is selected, the following dialog box will be displayed:
From Clipboard
Click From Clipboard to create a stamp from the current content of the clipboard. The new stamp will then be available in the new collection of the Stamps Palette and have the name "New Stamp". Select the stamp and click Rename to rename it.
You can contact us by phone, email or our social media accounts — we are here to assist you.