How do I create profiles for my PDF-XChange Printers?
Please note that a user asked this question in the PDF XChange forum. They were having to regularly change their settings and wanted to know if there was a way to save settings to a profile in order to save time.
Follow the steps below to add profiles:
1. Move to the Control Panel.
2. Click Devices and Printers. (The exact name of this option depends on the operating system in use).
3. Right-click the PDF-XChange Standard Printer or PDF-XChange Lite Printer.
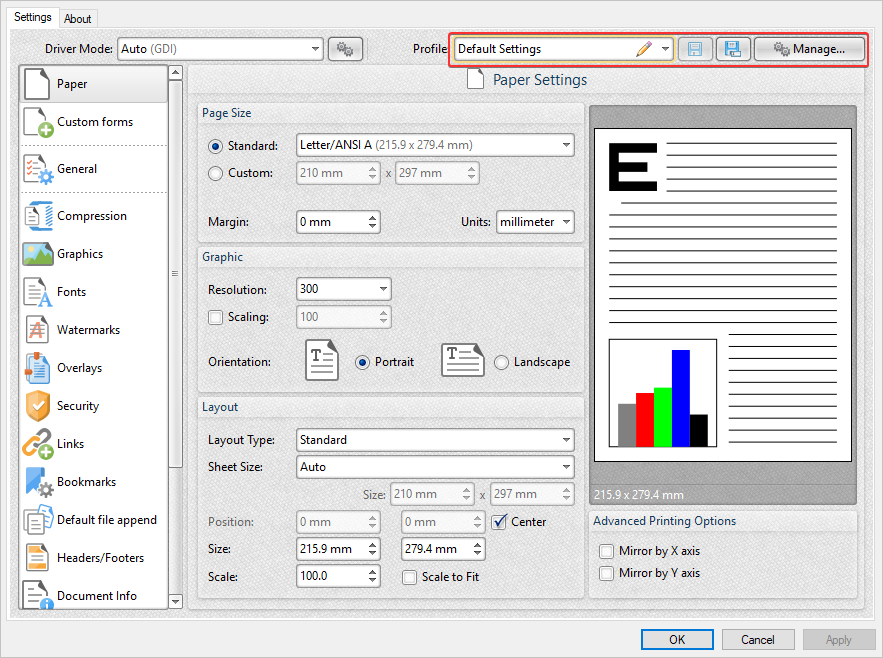
4. Click Printing Preferences. The Printing Preferences dialog box will open. Profile options are available on the upper right side:
5. Adjust the settings to determine the properties of the profile as desired.
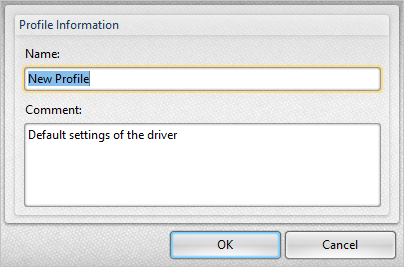
6. Click the New Profile button to save the customized settings. The Add Profile dialog box will open:
7. Enter a name for the profile and a comment as desired. (The comment will be displayed next to the profile in the list of printer profiles and can be used for ease of reference).
8. Click OK.
The profile will then be available in the Profile dropdown menu, which is highlighted in the top image above.
If you would like to set a custom profile as the default for our Standard printer.
1. Move to the Control Panel.
2. Click Devices and Printers. (The exact name of this option depends on the operating system in use).
3. Right-click the PDF-XChange Standard Printer.
4. Click Printing Preferences. The PDF-XChange Standard Printing Preferences dialog box will open.
5. Select the profile you would like to be the default from the dropdown menu, then click Apply.
6. Restart your PC to ensure the changes can properly take effect.
You can contact us by phone, email or our social media accounts — we are here to assist you.