Using ADMX and ADML Files with Group Policies
PDF XChange has created Active Directory Administrative Templates for PDF-XChange Editor, PDF-Tools and the PDF XChange Updater (which is used to auto-update all of our products). These templates were created in order to assist system administrators in deploying the software, and also to improve the user experience. The ADMX files that we provide are language-neutral and can be used to determine registry-based policy settings of specific features of our software. Additionally, we have also made the ADML files for language-specific settings available. Links to our ADMX and ADML files are provided below.
Further information on the management of Group Policy ADMX files is available here.
ADMX/AMDL Files
Click the links below to download the ADMX/ADML files for our products. Note that these files can be used to manage either local Group Policies or dolman-based Group Policies:
A zip archive of all current template files can be found here: https://www.pdf-xchange.com/Tracker_AD_AdministrativeTemplates.zip
The remainder of this article will detail the use of an ADMX file to determine a domain-based Group Policy. Please note:
Minimum Requirements
The following prerequisites are the minimum required in order to administer domain-based GPOs with PDF XChange's administrative template:
Using an ADMX File to Determine a Domain-Based Group Policy
This operation is a three-step process:
1. Populate the Central Store with the ADMX Files.
2. Use the Administrative Templates in a Policy.
3. Manage Group Policy Settings for PDF-XChange Editor and Enable/Disable the Policy.
The first step is to make the ADMX/ADML files available for use. Copy them to the following locations of the domain controller:
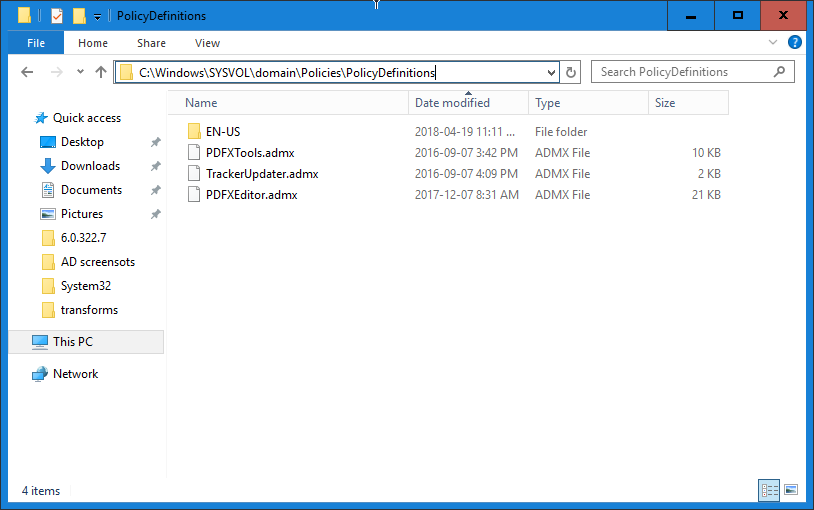
PDFXEditor.admx must be copied to the Central Store on the domain controller. The default location is:
C:\Windows\SYSVOL\domain\Policies\PolicyDefinitions
(as detailed below).
PDFXEditor.adml must be copied to the Central Store. The default location is:
C:\Windows\SYSVOL\domain\Policies\PolicyDefinitions\[MUIculture]
Note that the subfolder “EN-US” has been created in order to store the US English-specific language files. The templates can now be used to create/modify Group Policy objects, as they are located in the Central Store. The process of creating a new policy is detailed below.
The next step is to create a new policy that will manage the settings for PDF-XChange Editor:
1. Open the Group Policy management console on the associated Domain Controller. This can be done on either the Domain Controller itself or a management machine.
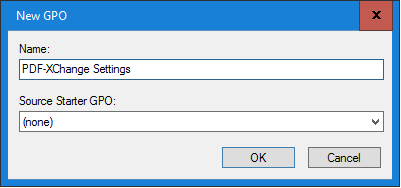
2. Create a new PDF-XChange Editor GPO for editing purposes. Right-click the Group Policy Objects node and select New. The New GPO dialog box will open. Type a name for the GPO:
3. Click OK.
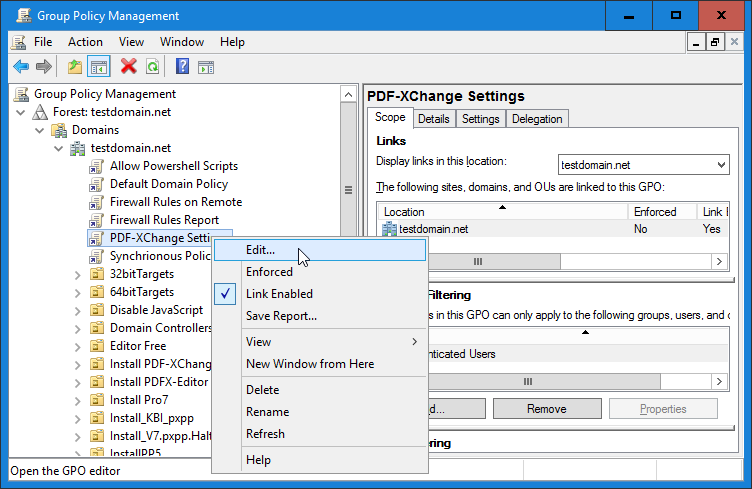
4. Expand the Group Policy Objects node, then right-click the new GPO and click Edit:
5. The Group Policy Management Editor dialog box will open and read all the ADMX files located in the Central Store. (Note that any ADMX files stored locally on an administrative machine will be ignored. This is because Group Policy tools will use only the ADMX files from the Central Store once a Central Store has been created). These policies are stored in the following location:
Computer Configuration -> Policies -> Administrative Templates: Policy Definitions (ADMX files) retrieved from the central store:
Available policies are grouped in categories for each application template. Note that this template is for Computer Configuration by design - we do not offer a User Configuration ADMX file. A PDF containing further information on the policies available within each category is available here.
Manage Group Policy Settings for PDF-XChange Editor
When new policies have been created, management is simply a matter of enabling or disabling them as desired. These processes are detailed below. Note that some policies contain additional settings, such as white lists and other optional parameters.
This example policy will modify whether or not PDF-XChange Editor checks that it is the default application for PDF files on the target computer.
Policy Title: Check if PDF-XChange Editor is default app.
Please note:
Policies are "not configured" by default, and must be enabled in order for their settings to be applied.
Follow the steps below to enable or disable a policy:
1. Select the category and setting to be modified:
File Associations -> Check if PDF-XChange Editor is default application (for example)
2. Right click the setting and then click Edit:
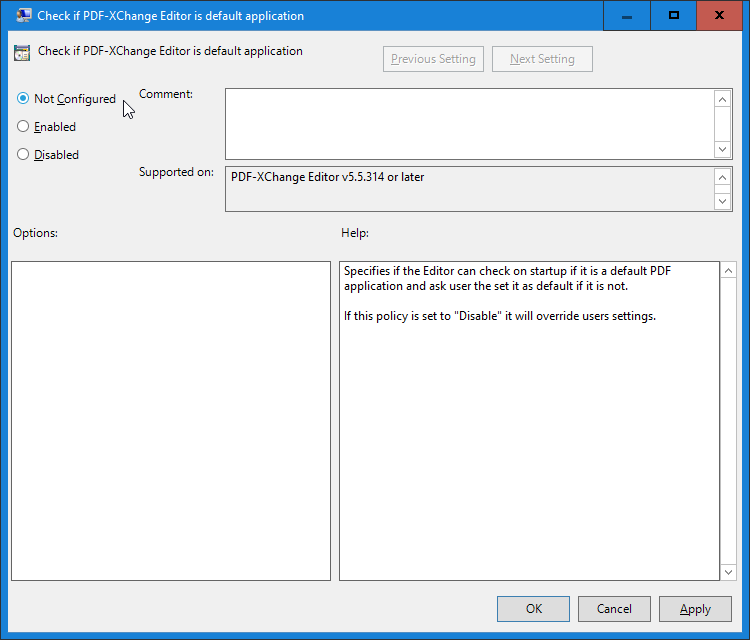
3. The Check if PDF-XChange Editor is default app dialog box will open:
4. Select Enabled or Disabled as desired and then click Apply.
You can contact us by phone, email or our social media accounts — we are here to assist you.