I have purchased PDF-Tools and would like to learn how to make the most of this purchase, where can I learn about it?
I have purchased PDF-Tools for a specific purpose, and would like to streamline the process so that I only have to use one tool, instead of five. How can I do this?
I was told that PDF-XChange PRO includes a powerful batch processing utility, how do I use it?
PDF-Tools has a large assortment of Actions available. These Actions are used to create every Tool that you see, including the default ones. To begin creating your own tools, click on Create in the PDF-Tools Menu bar.
We also offer Folder monitor functions for fully automating certain processes. See This KB Article for more details.
Below will be detailed the following sections, use the links to jump to that portion of the article:
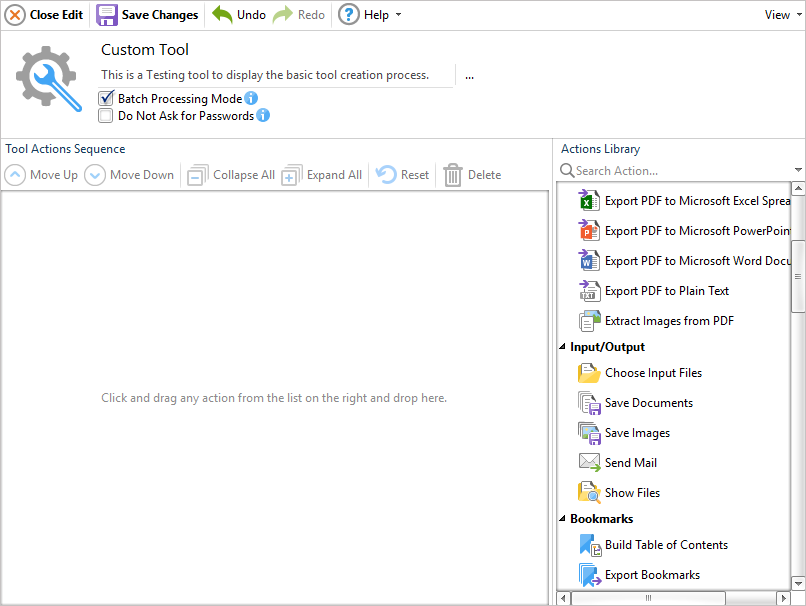
Once you have clicked Create, the New Tool window will open:
This window has a number of options, In the description area you can customize the name, description, batch processing, and password handling:
**Note: you can also change the Icon for your custom tool, however this must use windows .ico icon files.
The Actions Library contains a list of every action available to Tools, any time that we add new functions to PDF-Tools you will find the relevant actions added to this list. The Actions Library and the Tool Actions Sequence are connected, and actions can be taken from the Library to begin structuring your new Tool.
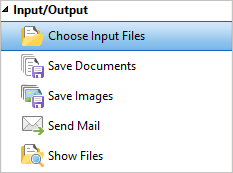
Every tool needs an input and output method, thus these should be the first actions we add to any tool. The Input/output actions are as follows:
Note: If you try to add an output action without any input actions in the tool you will see a warning detailing that you may have forgotten the input action.
A basic tool can be as simple and an input and output option, as an example, this tool will take any file and attempt to convert it to a PNG image file.
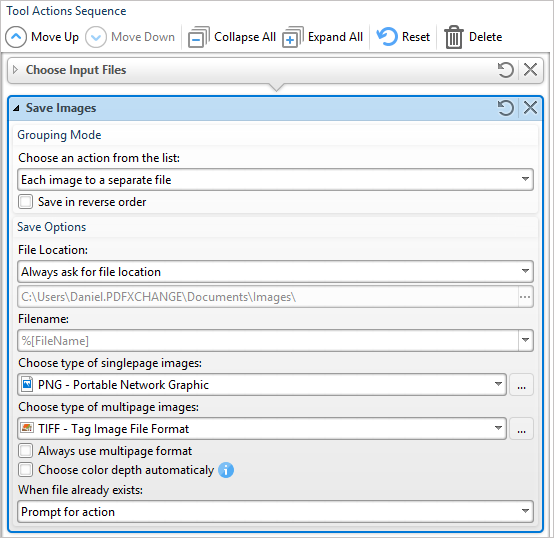
1. While customizing a tool, drag the Choose input Files and Save Images actions to the Tool Action Sequence.
2. Leave the Choose Input Files action as is, ths will prompt you to choose a file, when running the tool by default.
3. Customize the Save Image action to your desires, by default the settings will appear as above.
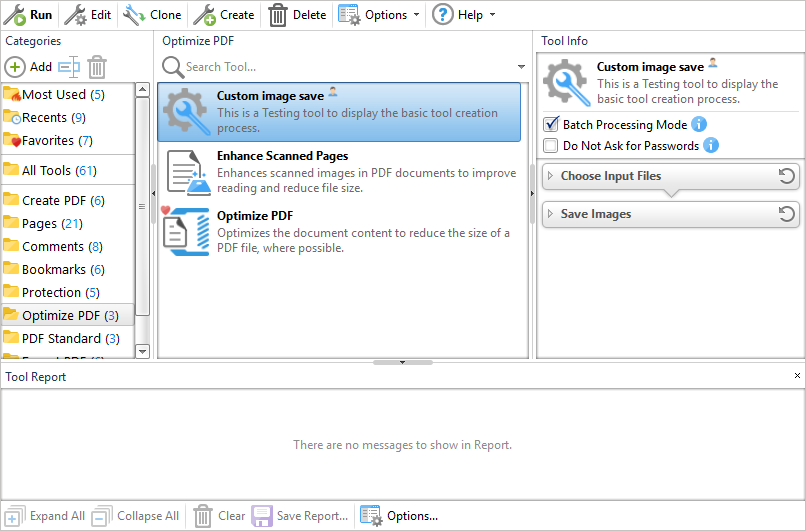
4. Click Save Changes in the top of the PDF-Tools window. Finally, click Close Edit to finish editing the tool.
5. The new tool will appear in the category you had selected when you clicked Create, you can move this by dragging it to a new category. there will be a small person icon displaying that this is a custom tool, as you can see below:
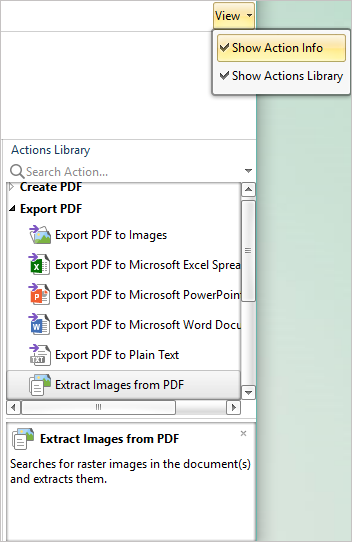
All Actions are detailed in depth in our PDF Tools Manual, the actions also include brief descriptions of their use, this is visible from the Action Info pane which can be toggled on and off in the View menu:
Some tools Interact with each other differently depending on their respective settings. Below has been detailed some of those cases.
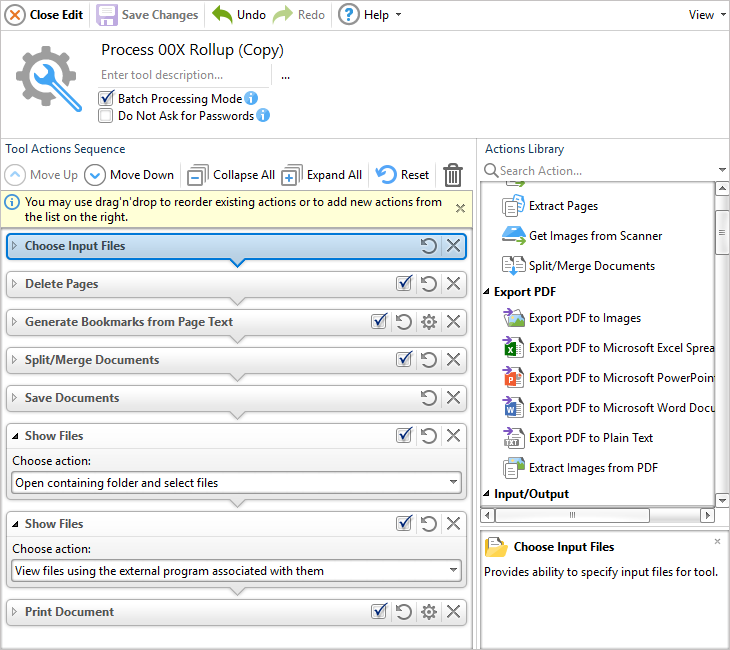
This Tool was created with a client for the purpose of simplifying their month end paperwork. They found themselves needing to manually split a document by branch, remove page 1, save a copy of each portion, print out a few copies of each document, and then send them to branch heads.
You can download a copy of this tool here, named Branch Split Demo Tool. This tool will:
In all, this has turned what was once a 15-20 minute manual process, into a roughly 1 minute, automated process. Looking over the steps, It seems fairly simple, however much is going on:
In Step 3 the bookmarks have been meticulously setup to detect the font size of the string of text, and wildcard characters have been used to ensure that all branches are collected. There are also stop words included to prevent extra bookmarks from being created by this process.
Jumping forward to Steps 4 and 5, you will notice that splitting the documents and naming them is a seperate action from saving them. It is possible to work with the documents while they are unsaved (temporary files). However in this case we have simply saved them as we plan to continue using them, the save documents step can be skipped if you deem it unnecessary.
During Steps 6 and 7 you will notice something strange, the same action is repeated twice. The show file dialog has two options, however only one of these can be selected at a time. In our case we want to open the documents inside the Editor for review, as well as see the resulting folder, we will use this later to send an email. In cases like this you can place the same tool multiple times in a sequence.
Finally at Step 8 the current documents are printed. The current documents being in this case the documents saved in step 5. If we were to skip the save documents action then the unsaved files from step 4 would be used instead for this operation.
There are many other tools that will intercommunicate with one another in similar fashions, the best way to learn is to experiment, or by reading the PDF-Tools user manual.
The most common error message you will see while creating new tools is the Requires Input files error.
This message typically means that you have forgotten to include an input method, or you have placed more than one "Final output" action in the sequence. As an example, if you needed to email a document and print it at the same time, you would need to have another "input" action after the most recent "output" action to bring the desired files back into memory.
If you encounter any error messages you do not understand, or have further questions about how to use PDF tools, please first read the PDF-Tools user manual if you cannot find a solution there, please contact support@pdf-xchange.com.
You can contact us by phone, email or our social media accounts — we are here to assist you.