I receive an error message and the update fails when I try to update the product. What should I do?
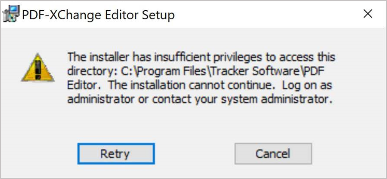
Note: if you see the error message below, please follow the steps in KB 524.
The simplest way to get around this issue is to manually uninstall the software, and then run the latest installer from your account page instead of using the Updater. Note however that in some situations Windows can "lose" the original installer and become unable to properly perform any install or uninstall of our software. In this case, Please email us directly with a screenshot of the error message that you received, and we will work through the problem with you directly.
Due to the nature of these issues, the resolution can be vastly different for each case, in order to assist we will usually require some form of logging to have been enabled and sent to us. Please email us with a screenshot of the error message that you received, and a log from the PDF XChange Updater. Follow the steps below to create the log:
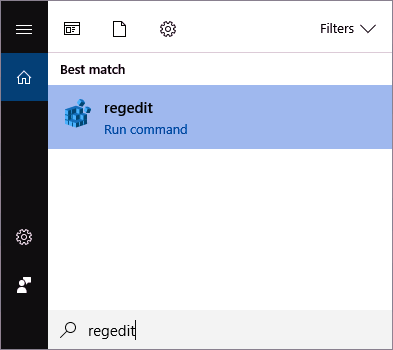
1. Open the Windows search prompt, then enter "regedit" (as detailed below) and press Enter. Note that administrative privileges are required to access the windows registry. If you do not have these then ask your network administrator to perform this task for you.
2. Click Yes in the User Account Control dialog box. The Windows Registry will open.
Note that the Windows Registry is browsed in the same manner as Windows Explorer - click folders to expand them and view their subfolders.
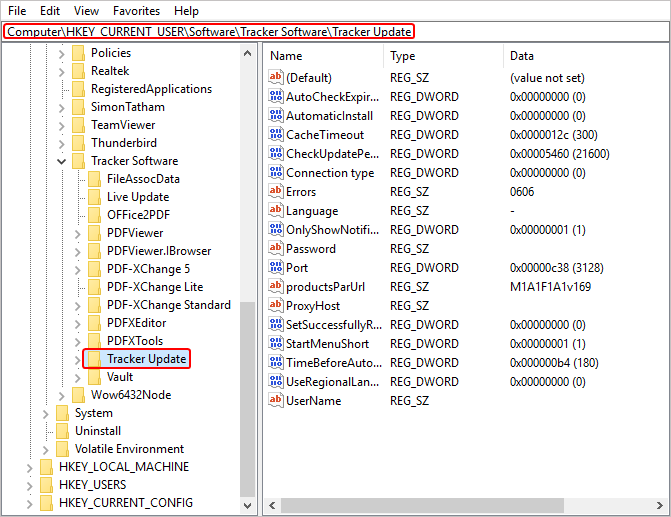
3. Move to HKEY_CURRENT_USER\SOFTWARE\Tracker Software\Tracker Update:
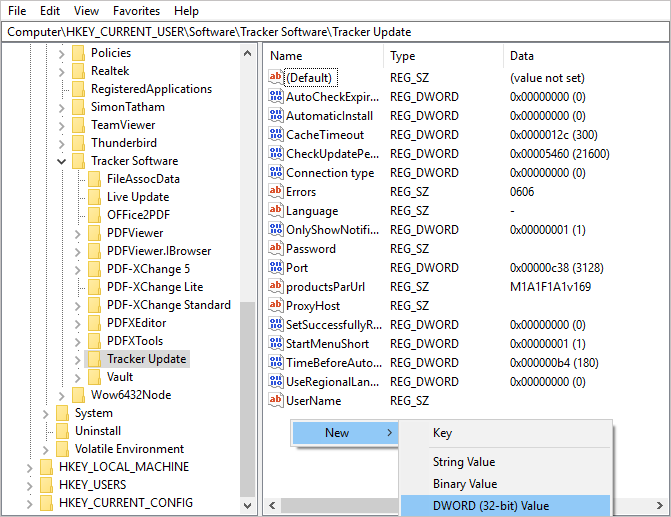
4. Right-click anywhere in the whites pace, click New and then click DWORD (32-bit) Value:
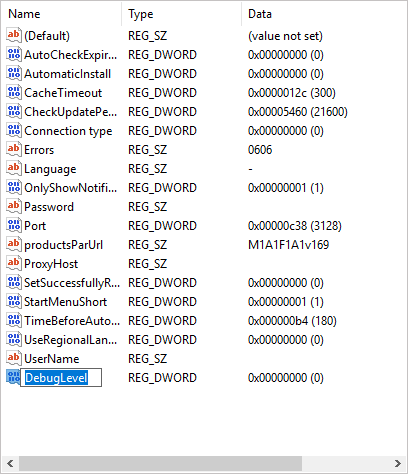
5. A new key will appear at the bottom of the list. Name the new key DebugLevel:
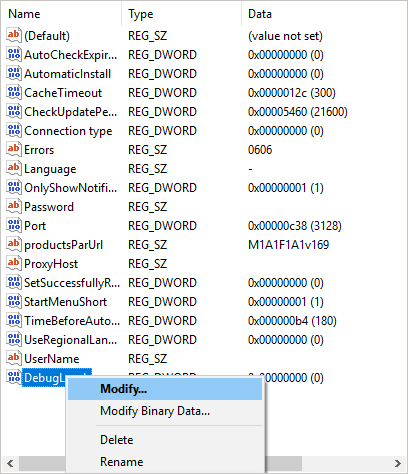
6. Press Enter, or click outside of the text box, then right-click the DebugLevel key and click Modify in the submenu:
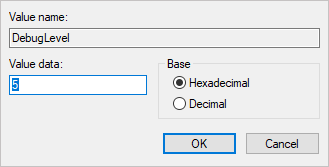
7. Ensure that the Base option is set to Hexadecimal, then enter 5 in the Value data text box:
8. Click OK.
9. Close Regedit.
10. Ensure that the PDF XChange Updater is closed, then open the Windows search prompt, enter "PDF XChange Updater" and press Enter. The PDF XChange Updater will open.
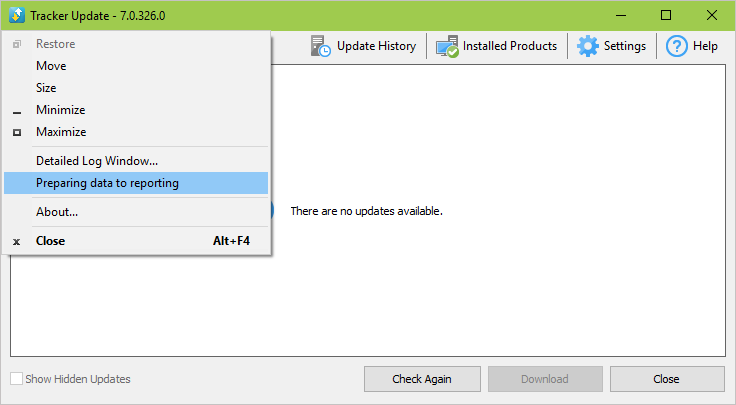
11. Click the icon in the upper-left corner of the user interface (detailed below) and click Prepare Data for Report:
Note that in older builds this option is listed as "Preparing data to reporting" - as in the image above.
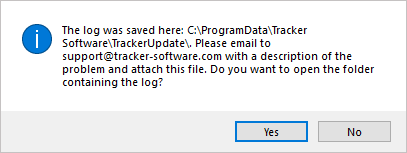
12. Click Yes in the Preparing data report dialog box:
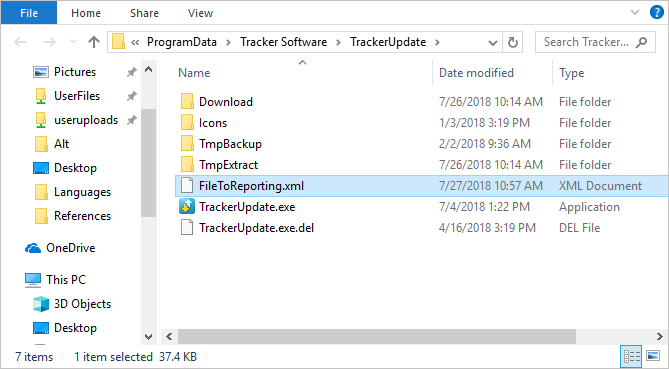
The output folder will open and the XML file that contains the log will be selected, as detailed below. (Note that the name of this file varies depending on the build).
13. Attach this file to the email and send it to PDF XChange.
You can contact us by phone, email or our social media accounts — we are here to assist you.