Currently the PDF-XChange Editor does not offer the ability to print the grid-lines that can be activated from the view tab. These are intended to be a visual aid while editing the document, and can also function as anchor points for our measurement functions. As such, If you wish to print these on the document, you must create custom grid-sheets and apply them as a watermark to the document.
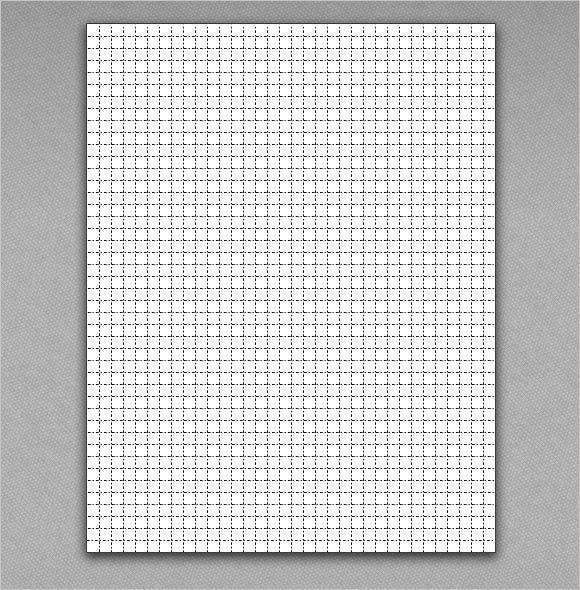
The PDF XChange Support team has elected to provide a few sample grids to make this process simpler in common situations. Please find below Letter, A4, and 24x18 sheets with black dashed lines to apply per the Apply a Grid-Sheet as a Watermark section.
Letter Sized Grid Sheet Download
A4 Sized Grid Sheet Download
Landscape 24x18 Grid Sheet Download
If necessary, you can create your own custom sized grid-sheet to match your document size or place less widely spaced lines.
Within the Editor
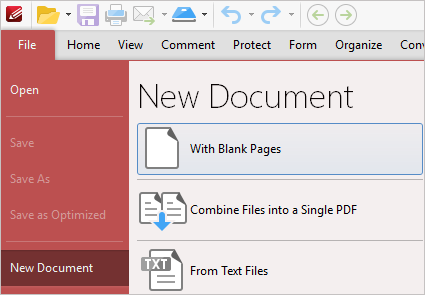
1. On the File tab, Select New Document and choose With Blank Pages.
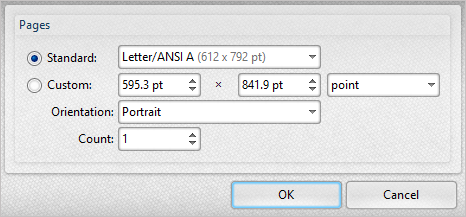
The New Empty Document dialog will appear.
**Remember the Measurements that are set (ie, in this document we have selected Letter paper, which is 612x792 pt), this is needed for a calculation later on.
2. Choose a standard or custom page size from the menu and press OK.
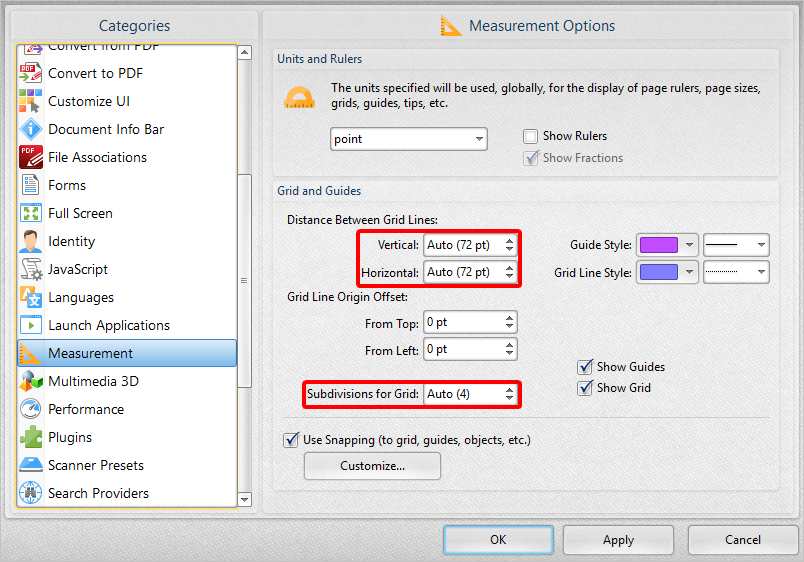
If you do not have Grid-lines enabled, we recommend turning them on now.
3. Your document should now appear similar to this.
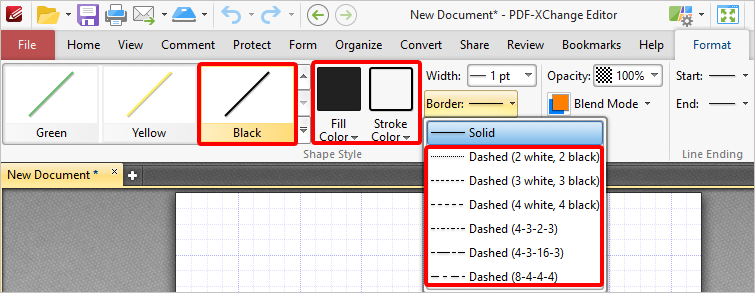
4. On the Comment tab, select the line tool, then open the format tab.
5. On the Format tab, use the Shape Style options to select your desired Color and Border Style.
**Note that later in the process we will be fading the colors chosen here, so light colors (while they can be used) are ill advised.
6. Place your First line from the bottom Left of the page to the Bottom right of the page, Following the lowest visible grid-line.
The next two steps will use the Vertical values we have recorded before.
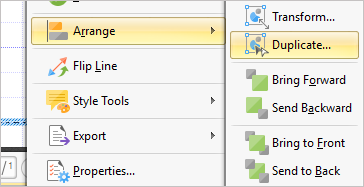
7. Right click on this new line and choose Arrange > Duplicate.
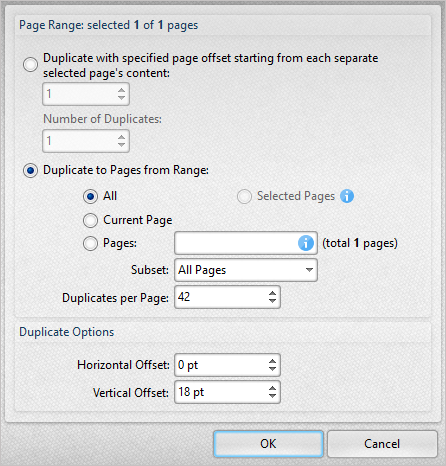
The Duplicate Annotations dialog will appear.
8. Select Duplicate to Pages from a range > All
Some math is required to fill in the remaining details.
First we will find the offset values, this can be done by taking the Distance between Grid lines value (72 in this example) and dividing it by the Subdivisions for grid value (4 in this example) which we recorded in step 2.
Now that we have the offset value, we need to know the number of duplicates we are making in each direction. First we will do the Vertical calculation. For this we need the offset (18), and the vertical page size that was recorded in step 1. If the value is uneven round it down to the nearest whole number.
We subtract 2 because one of the lines already exists, and if we created 43 of them, one of the lines would appear on the edge of the page.
Now we fill in the values to make the correct amount of duplicates and press OK.
When inputting the Horizontal value later, remember to change the vertical offset to 0 pt before you press OK.
**This is only for the vertical value currently, we will redo this for the horizontal values in the next steps.
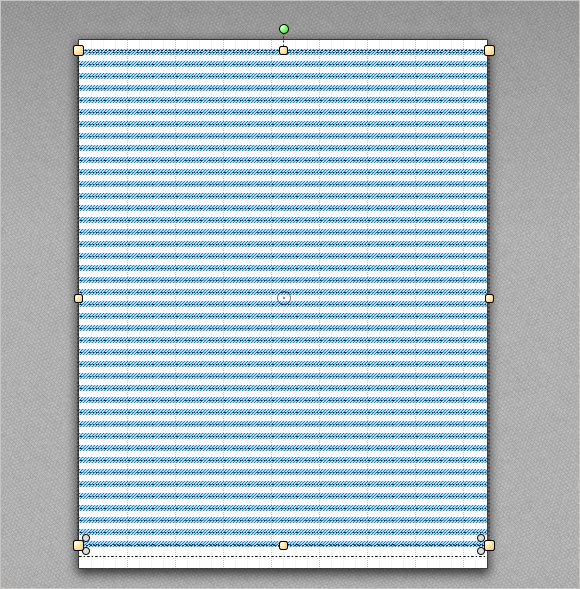
Your document should now look similar to this.
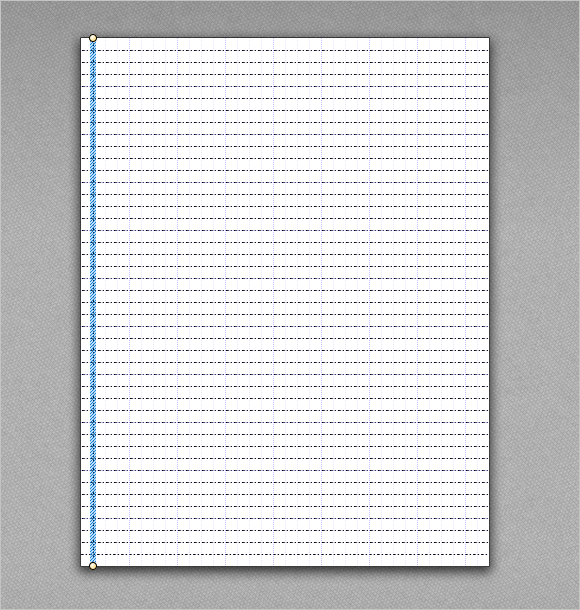
9. Press ESC to deselect the current lines, then draw a new line from the bottom left corner, to the top left corner, like so.
10. Repeat steps 7 and 8 using the Horizontal values instead of the vertical values. Your final document should appear like so.
11. Save this document with a friendly name to a location you can find it easily (such as your desktop).
You can now use this file to apply a grid to any document!
Within the Editor, once the grid sheet has been created, or you have downloaded one of the template sheets.
1. Open the document you wish to apply grid-lines to, and on the Organize tab, click Watermark > add.
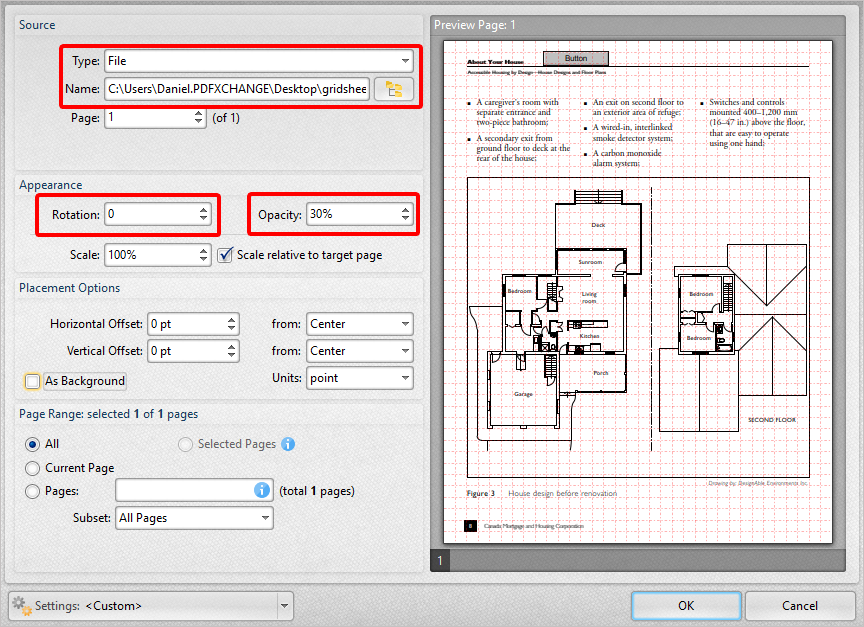
2. In the following dialog, select Type > File, and then choose the template, or the custom grid-sheet you have created.
Set the Rotation to 0 and the Opacity to a desired amount (our example shows 30%, but we have found that this may be too light for some printers and recommend 50%).
All other values should be left in their defaults, use the image below as reference.
3. Press OK to apply the watermark to the document.
You can now print the document with these grid-lines in place. Should you wish to remove them in the future, simple open the organize tab, and press watermarks Manage.
You can contact us by phone, email or our social media accounts — we are here to assist you.