I set the PDF-XChange Editor as the default application for .pdf files, however it keeps changing without my doing anything.
There are a myriad of possible reasons the .pdf file associations may change. Other applications sometimes take the association when they update themselves, sometimes Windows sets The Edge as the default.
Since Windows 10, setting file associations without user interaction has become increasingly difficult to do programatically. While this helps individual users limit the chance that software will make unwanted changes, it does pose a challenge for pushing the association via script or during installation of a product.
While this is not such an issue for new installations, it can be problematic when users have existing .pdf file associations set. When setting the file associations through the Editor or by manipulating the registry users are still free to change those settings. Enforcing the file associations is best done via a Group Policy. Evenn though the setting can be changed, it will revert to the Policy set association next login GPUpdate.
The following describes how to create a Group Policy that will enforce and reset the file associations to the PDF-Xchange Editor on log in and can be used in a Managed (Domain) environment as well as on stand alone PCs by applying the Policy through the Local Group Policy Editor.
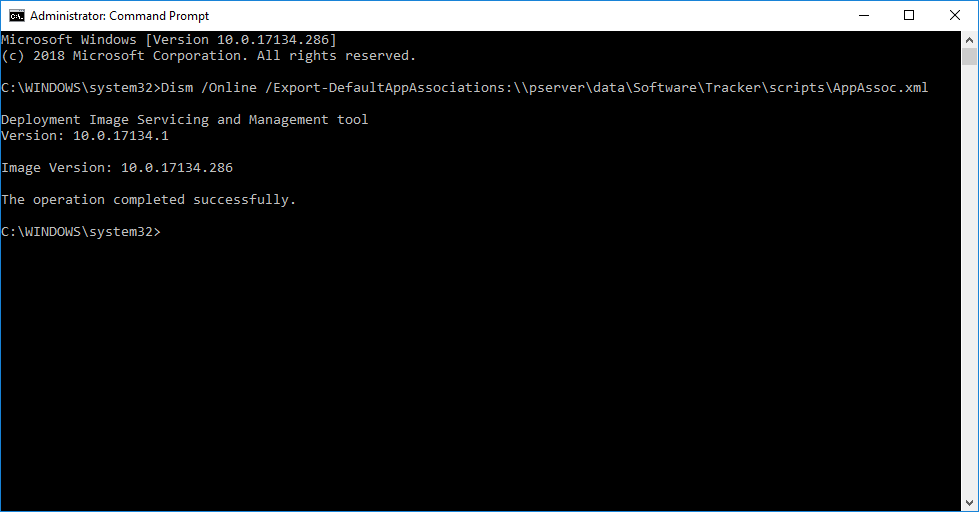
The first thing to do is create an xml file that defines the file associations to enforce. This is done using the DISM tool at an administrative command prompt with the command:
Dism /Online /Export-DefaultAppAssociations:<XML path>\AppAssoc.xml
Exporting current file associations to XML file.
The resultant file will list ALL the file associations set on that machine so make sure they are all exactly as you want before running the command. This XML file needs to be available to the clients for whom the Group Policy will be applied so put it on a shared network location or push it to you target machine's local file system. For example, C:\Windows\System32 (do not use a user-specific location).
Once you have the file, remove from it all entries you do not want to enforce. The Group Policy can be used to enforce any file association, not just PDF related ones. In this example we will be associating .pdf, .fdf, .xfdf, and .xcesession with the PDF-XChange Editor, as well as .pdtex, and .pdts with PDF-Tools.
<?xml version="1.0" encoding="UTF-8"?> <DefaultAssociations> <Association Identifier=".fdf" ProgId="PDFXEdit.FDF" ApplicationName="PDF-XChange Editor" /> <Association Identifier=".xfdf" ProgId="PDFXEdit.XFDF" ApplicationName="PDF-XChange Editor" /> <Association Identifier=".pdf" ProgId="PDFXEdit.PDF" ApplicationName="PDF-XChange Editor" /> <Association Identifier=".xclpack" ProgId="PDFXEdit.XCLPACK" ApplicationName="PDF-XChange Editor" /> <Association Identifier=".xcesession" ProgId="PDFXEdit.XCESESSION" ApplicationName="PDF-XChange Editor" /> <Association Identifier=".pdtex" ProgId="PDFXTools.PDTEX" ApplicationName="PDF-Tools" /> <Association Identifier=".pdts" ProgId="PDFXTools.PDTS" ApplicationName="PDF-Tools" /> <Association Identifier=".xcvault" ProgId="XCVault.XCVAULT" ApplicationName="XCVault Utility" /> </DefaultAssociations>
App Association XML file with recommended entries for associating PDF-XChange products with commonly used PDF extensions.
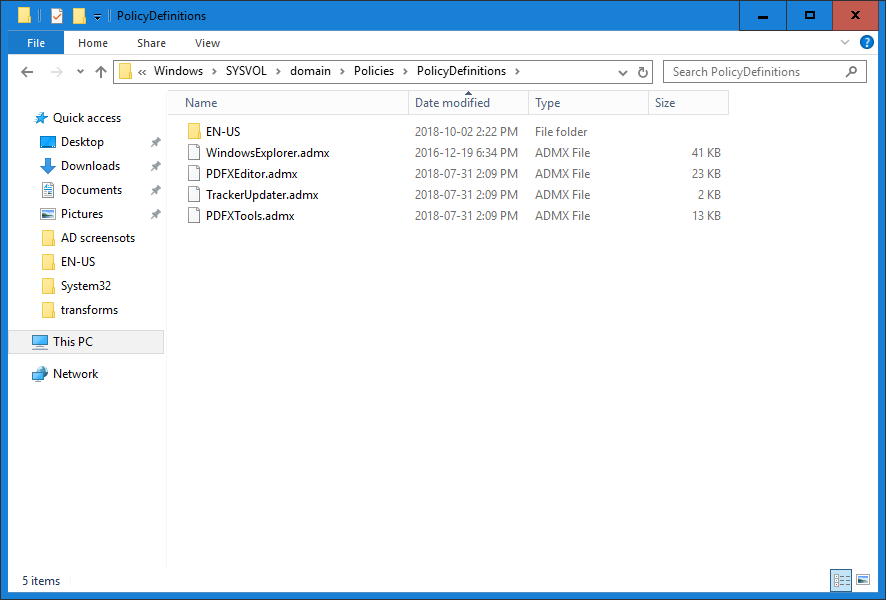
Note that in Windows Server 2016 you may need to download the Administrative Policy Templates: https://www.microsoft.com/en-us/download/details.aspx?id=53430 and put the WindowsExplorer.admx and .adml files in the Policy Definitions folder for your Central Store on your Domain Controller, typically C:\Windows\SYSVOL\domain\Policies\PolicyDefinitions :
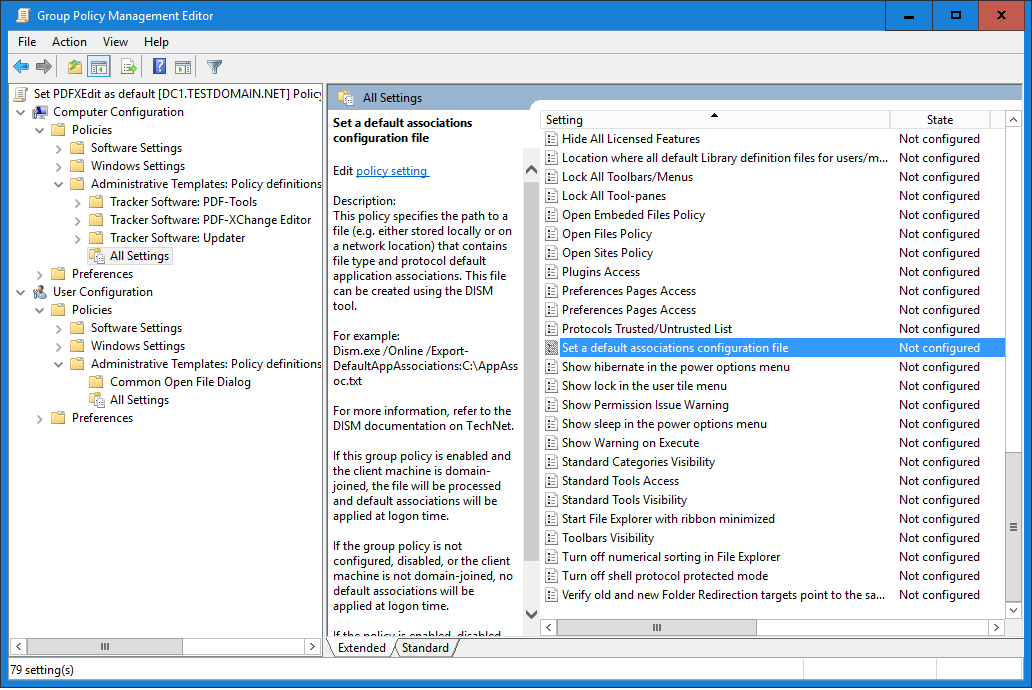
Find the policy "Set a default associations configuration file" under Computer Configuration\Policies\Administrative Templates\All Settings:
Set default associations configuration file as seen in the Group Policy Management Editor on a Server 2016 Domain Controller.
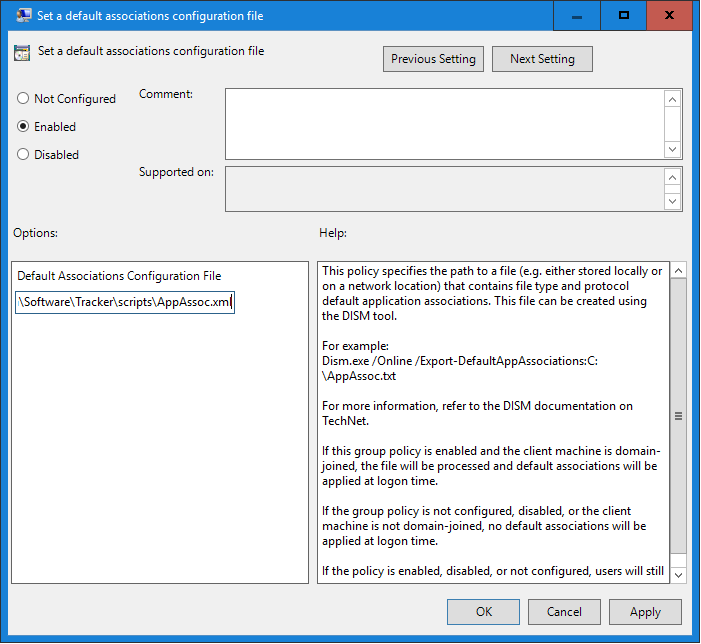
Set the path to the AppAssoc.xml file we created earlier.
Setting a path to the Application Association definition file in AD.
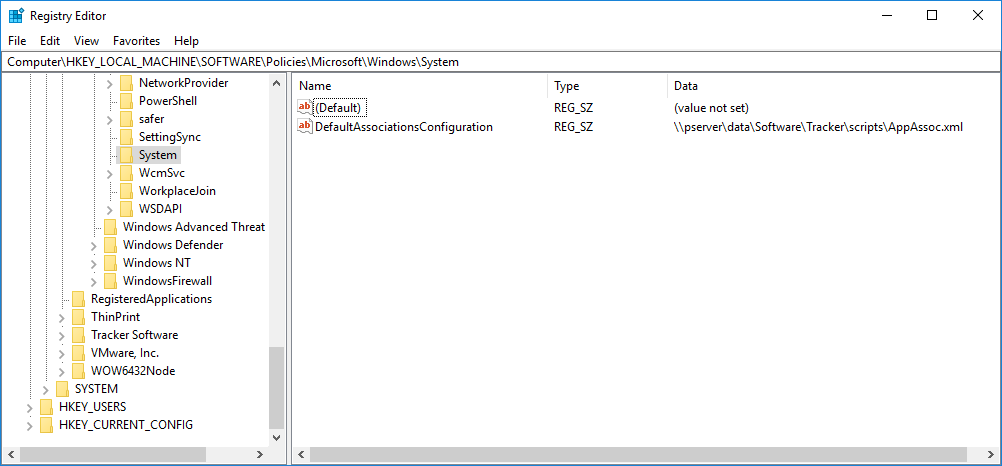
After a Group Policy Update you should see the policy in Computer\HKEY_LOCAL_MACHINE\SOFTWARE\Policies\Microsoft\Windows\System:
DefaultAssociationsConfiguration policy set.
Things to note:
You can contact us by phone, email or our social media accounts — we are here to assist you.